Hanky Panky
 Al and I have decided to cut back on the disposables, so out go the paper tissues, and in come the handkerchiefs! It’s an old fashioned concept using a hankie. I have fond memories of my grandfather carrying a plaid one. It’s true they have fallen out of style but when you think about disposables in terms of their impact on our planet you’ll be surprised to hear that according to the Washington Post 95% of U.S. paper products are made from virgin trees. We could have chosen a recycled paper product but Al and I are determined to redesign our lifestyle to be as low impact as possible and break free of the chains of compulsory consumerism, so hankies are a great place to start. There are many benefits. Cloth is soft on the nose. Hankies are cheap, they can be made from fabric scraps (old clothes, blankets, pillow cases, etc.) or bought online for much less than the price you’d pay for a year’s supply of tissues. If you consider a box of tissues goes for about $1.50 each, and we buy one box a week, that’s 78 reasons to use hankies!
Practicalities:
Hankies took some getting used to but after a week of using them, I never want to go back! I recommend a thick fabric or a double layer design (refer to my how-to sew hankies below) to deal with *cough* moisture. It’s best to have at least one hankie per a person for every day of the week. I also made several back up hankies for each of us just in case. We have two clearly marked bins in our bathroom, one for “clean” and another for “dirty”. I wash all the dirties at the end of each week. This week I pre-treated with Shout and then threw them in with my regular laundry, although in the future I will be researching greener ways to pre-treat.
Hankies are no less sanitary than disposable tissues, you can’t get sick from your own germs after all. Perhaps if you have a bad cold or the flu you may want to use recycled disposable tissues for the duration because of the prolific nature of use, but a hankie should be more than sufficient for regular day-to-day needs.
Etiquette:
Hankies carry an air of old-fashioned class. Regrettably, disposables have led to the loss of many a beautiful tradition. With a little a research I found:
- Always use only one side of your hankie and fold it up between uses.
- Gentlemen, you will impress the ladies by having an extra clean one to offer to a teary-eyed damsel in distress.
- Ladies, the bane of our clothing design is the lack of pockets…but worry not. You can slip your hankie in your sleeve, down the cleft of your bosom, or folded in the waistband of a skirt. All three work just fine but back-in-the-day there was a complex courtship ritual involving slowly revealing your hankie from your sleeve…perhaps we can bring it back into style.
If you are a die-hard romantic like me you’ll want to check out this website on the Various Customs Associated with Courting and Love detailing the secret language of handkerchiefs used between lovers.
How to sew your own handkerchiefs:
Step 1: Cut two 12.5 x 12.5 squares of fabric. They can be the same fabric or two different kinds. I’ve used both cotton and flannel to great success but I suppose any fabric that feels soft would work. They can be smaller this if you want. I like to have a 8 x8 square myself because it is less bulky to carry in a pocket–thus more ladylike in my opinion. Just tweak the design to adjust to your tastes. You will want to start with bigger pieces of fabric than the final product though to save room for the seams.
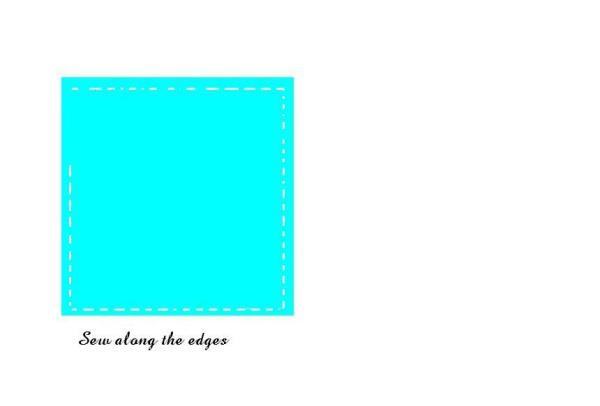
Step 2: Once you have cut your squares lie them on top of each other, putting the “good” sides together. Pin around the edges.
Step 3: Sew almost all the way around using a straight stitch about 1/4 inch away from the edge of the fabric.
Step 4: Trim off the corners and all of the excess fabric.
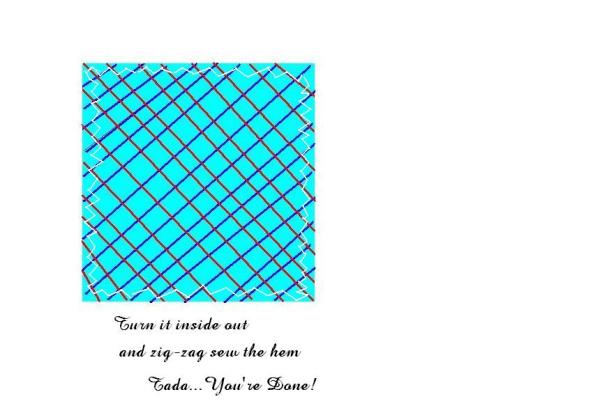
Step 5: Now using the section you left unstitched turn the whole thing inside out. Make it as smooth as possible. Tuck the unstitched section as neatly as possible to create a nice seam and pin it into place. Now using a zig-zag stitch sew along the border. Again sew about 1/4 away from the edge. Do this as neatly as possible. I like to round out the corners.
And you have your first handkerchief! I found that the whole process takes 10-15 minutes.


I’ve been using hankies for years and I love them too, my grandma gave me her collection. I feel like a lady (kind of) except for the icky coughing and sneezing : ).
Thank you for the great idea and instructions! I made a whole bunch of double flannel handkerchiefs from just a yard and a half of white flannel. I walk the dogs all winter so I made them 10×10 “so they will be substantial for outdoors.